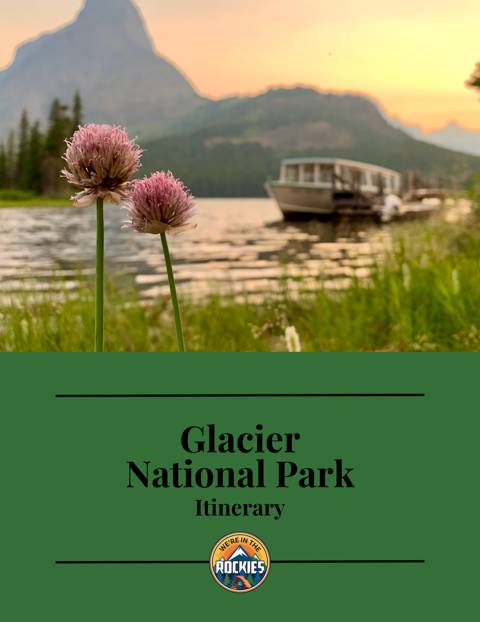
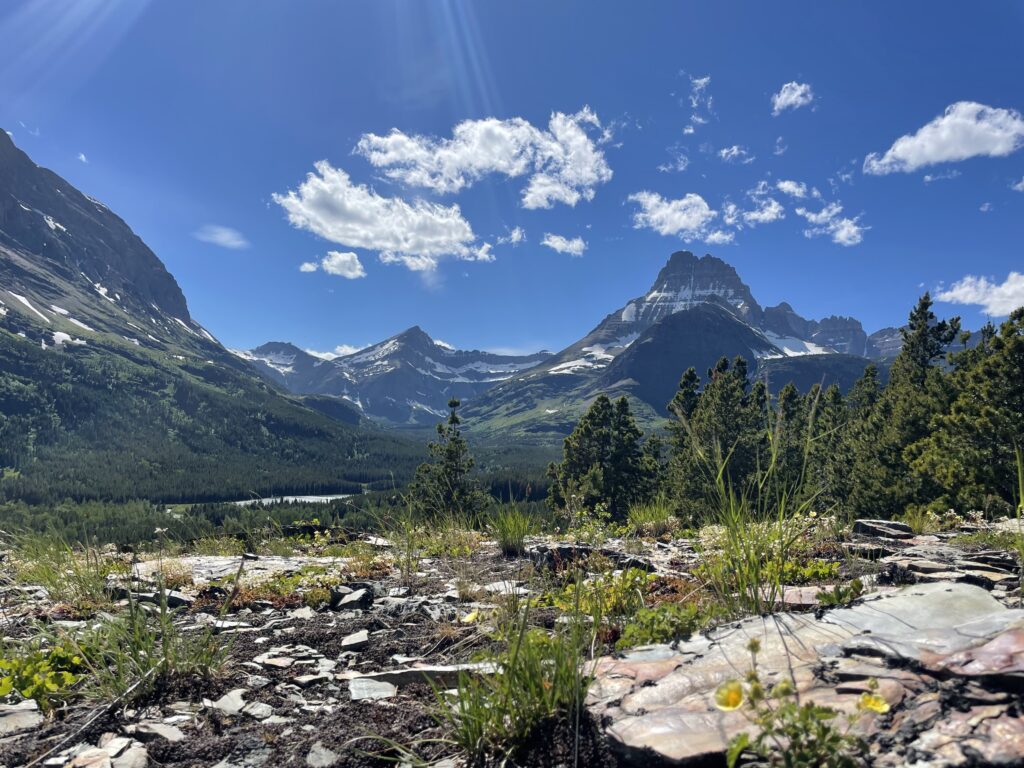
Glacier National Park is a hiker’s paradise, with 734 miles of trail that carry you through lush valleys, into alpine wildflower meadows, and past sparkling rivers and turquoise lakes.
Glacier truly has something for everyone when it comes to hiking options. If you are physically able, I highly recommend taking an all-day hike, as it is the best way to experience the park, in my opinion. If taking a long hike is not something you will be doing on your vacation, don’t worry. There is an incredible experience to be had hiking in Glacier, whether you are an intrepid explorer hiking long distances or a more laid-back adventurer hoping to walk just a mile or two.
I have lived and worked in Glacier every summer of my life, and I have hiked hundreds of miles of Glacier’s trails. Keep reading to learn about my favorite hikes and expert tips for hiking in Glacier National Park.
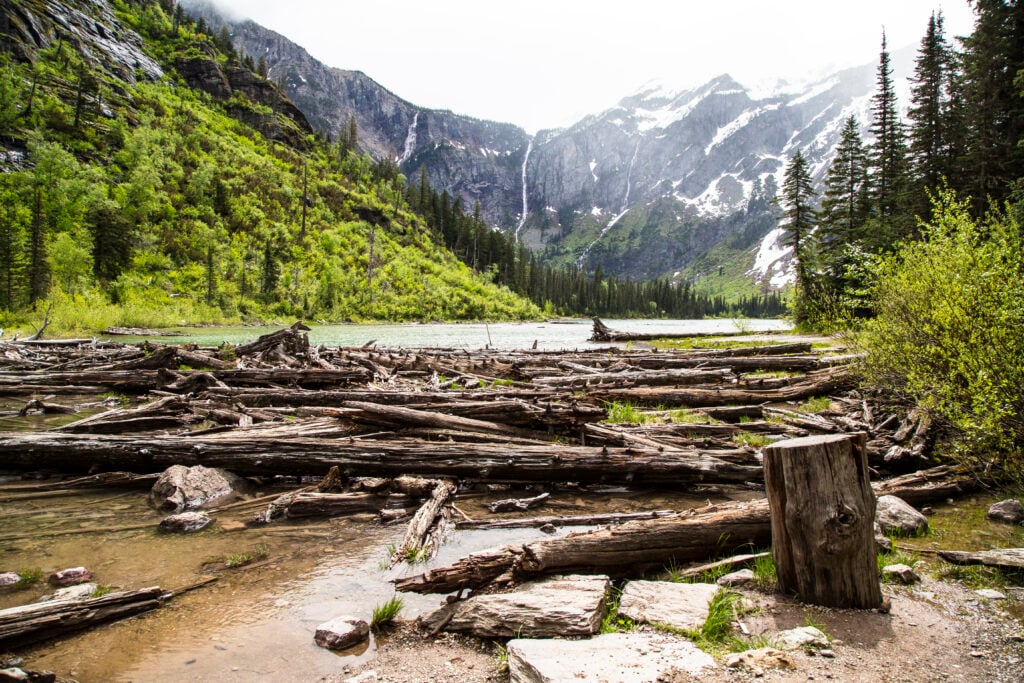
What You Will See: The Avalanche Lake trail starts on the Trail of the Cedars boardwalk that takes you through a towering cedar-hemlock forest. This is one of my favorite sections of trail in the entire park because I love the huge trees. Then the trail branches off and starts following Avalanche Creek as it plunges through a deep gorge.
The views of the creek are amazing, but don’t get too close to the edge! Slippery rocks and cold, fast-moving water are a deadly combination. The trail loosely follows Avalanche Creek up the valley toward the lake, and as you weave through the woods, you get great views of the surrounding mountains. Bring your binoculars and look for mountain goats dotting the cliffs that come into view as you get closer to the lake.
When you reach the lake, you can find a nice spot for a snack, or you can follow the trail to keep walking around the lake to get away from other people and find a secluded spot to relax. The lake itself is a stunning turquoise color and is surrounded by towering mountains and cascading waterfalls. The view is absolutely amazing!
Tips: There are restrooms and drinking water spigots located in the Avalanche Campground loops near the trailhead.

Get our done‑for‑you, 4-day plan with exact drives and must‑see stops so you don’t waste time in traffic or miss the best views
Inside the guide:
*Step-by-step plan that will take you to the hikes, drives, waterfalls, and lakes
*Exact time-frames and star-ratings so you can make the best use of your time and money
*Best Friend Guarantee: Love it or get your money back
*Visiting more National Parks? Save big $ and get guides for Banff, Jasper, and Glacier with our Canadian Rockies Bundle.
HELPFUL TIP: Parking at the Avalanche trailhead can be challenging! Arrive very early in the morning or later in the evening to miss the busiest part of the day. I have had great luck hiking this trail in the evening, around 5 or 6 pm. The light is beautiful in the evening, and the crowds are smaller.
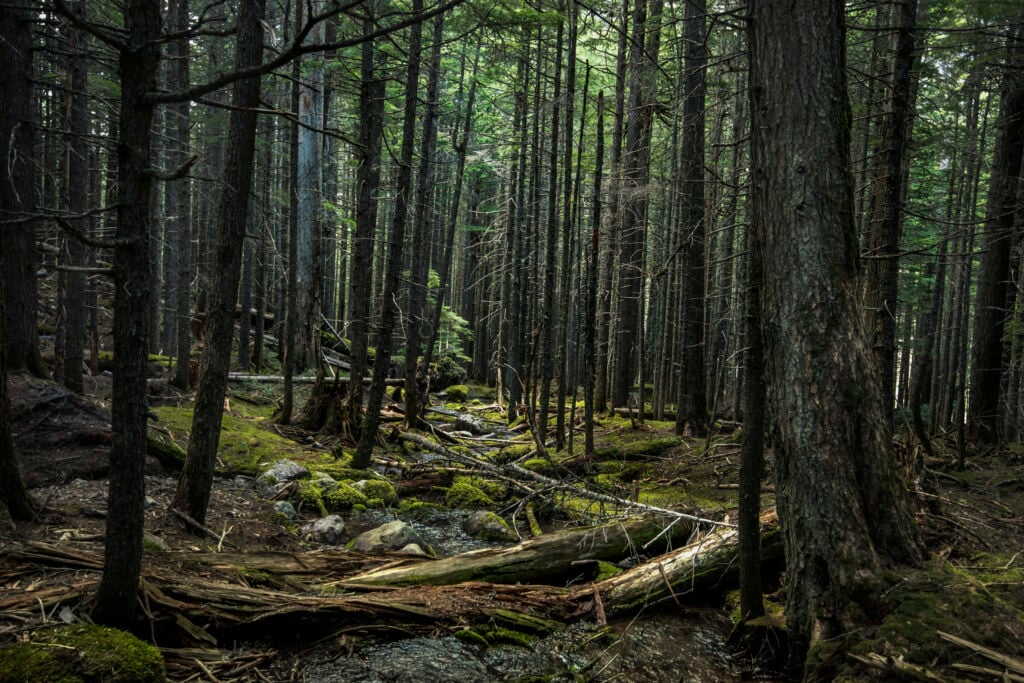
What You Will See: The Trail of the Cedars is a beautiful loop through a lush, old-growth forest of cedar and hemlock. It is one of my favorite little trails in the park! You are so close to the road, and it is accessible for all, yet it still feels so peaceful. Some trees along this trail are over 100 feet tall and estimated to be around 500 years old. It is an amazing feeling to travel among giants! About halfway around the loop, you will cross a footbridge over Avalanche Creek, which gives you great views of Avalanche Gorge as ice-cold water races through the narrow rock walls. It’s so amazing to see how powerful the water is. There are interpretive signs along the path with information about the surrounding flora and fauna, and some have poems on them that are fun to read.
Tips: Parking can be difficult here! Take the free shuttle to reach this trailhead, or arrive early in the morning or later in the evening to miss the biggest crowds. There are drinking water spigots and restrooms located near the trailhead in the Avalanche Campground loops.


Printable step‑by‑step guide with driving tips, rules, and shuttle options so you can enjoy the views instead of worrying you’ll do it “wrong.”
Inside the guide:
*Exactly how to drive the road: best direction, typical drive time, and where it’s safest to stop for photos
*Season dates, closures, and vehicle rules so you know when the road is usually open and whether your car / RV is allowed
*Parking and timing tips for Logan Pass to avoid circling for spots or missing the best viewpoints
*Shuttle & tour options if you’d rather not drive the steep, narrow sections yourself
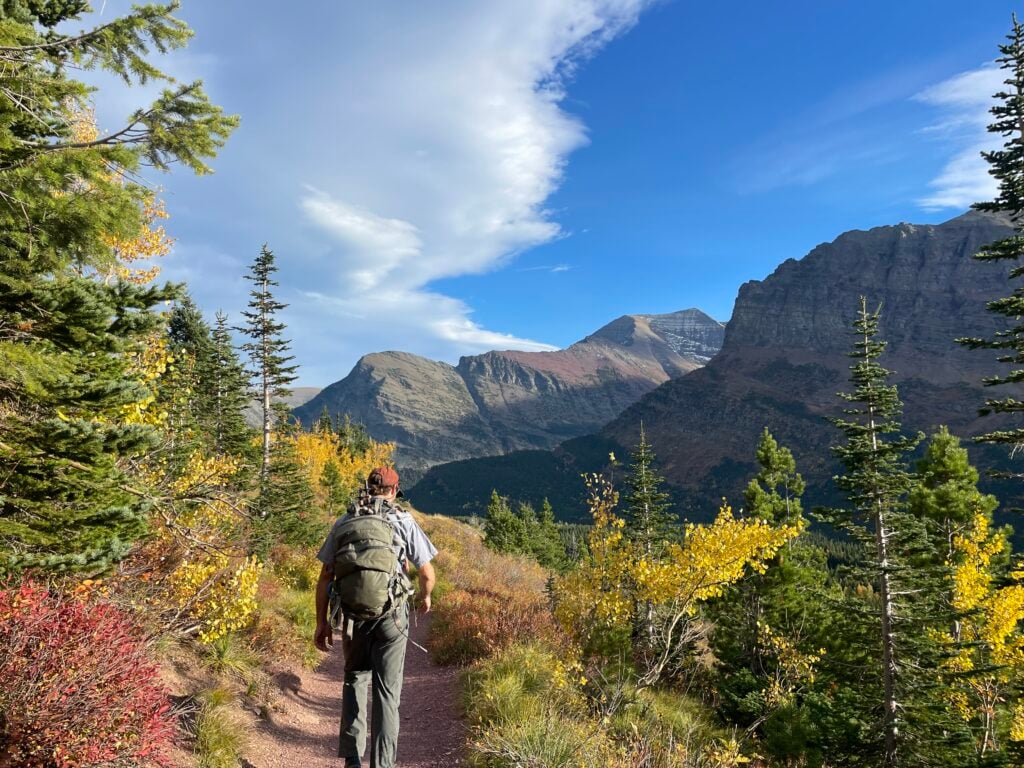
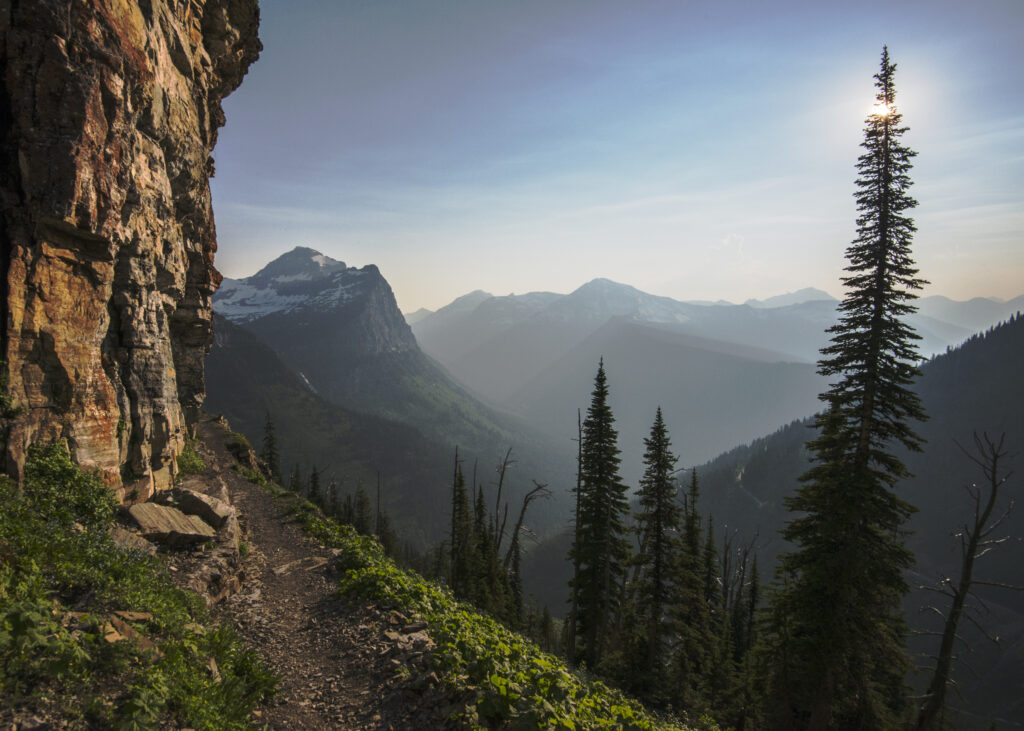
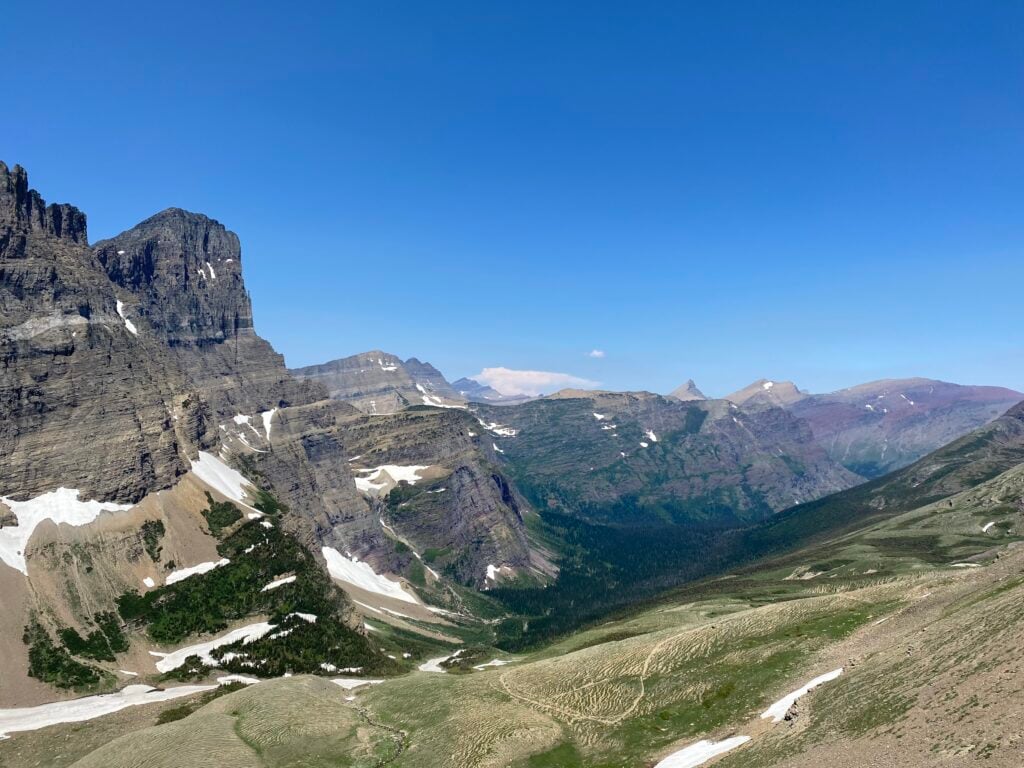
What You Will See: The Highline Trail starts at Logan Pass, the highest point on the Going-to-the-Sun Road. It is one of the most iconic hikes in Glacier because of the expansive mountain views you get as you traverse the Continental Divide, also called the Garden Wall. If I were going to pick one hike to do in Glacier, it would be this one! Even if you only walk the first half-mile of the trail, it will be worth it for the views.
After the first half mile or so, the trail can be scary for some because it is very narrow as it takes you through cliffs with the road visible 100 feet below a steep drop-off. There is a cable installed along the cliff that you can hold on to, but people with a fear of heights may not enjoy this section. Luckily, the steep cliff section only lasts about three-tenths of a mile, and then it’s smooth sailing.
The trail continues through the ledges and meadows of the Garden Wall, with sweeping views of the mountains around and the valley below. After about 2.5 miles, you will begin the switchbacks toward Haystack Butte. Most people end their hike when they reach the pass below Haystack Butte. This is a great place to have lunch or a snack before turning around to go back to Logan Pass.
You can continue toward Granite Park Chalet or the Grinnell Glacier Overlook if you wish, but know that this will add significant mileage and elevation gain. If you hike to Granite Park Chalet, the round-trip distance is 15.2 miles, and the elevation gain is 1900 feet. If you hike to Grinnell Glacier Overlook from the Highline Trail, the round-trip distance is 15.5 miles, and the elevation gain is 2600 feet.
Tips: Because of seasonal snow drifts, the Highline Trail usually opens sometime in mid- to late-July. There is not much shade on the Highline Trail, so make sure to bring plenty of water and wear sunscreen. There are restrooms and water bottle filling stations at Logan Pass. The Logan Pass parking lot usually fills early in the morning, so consider taking the free shuttle to avoid parking headaches.
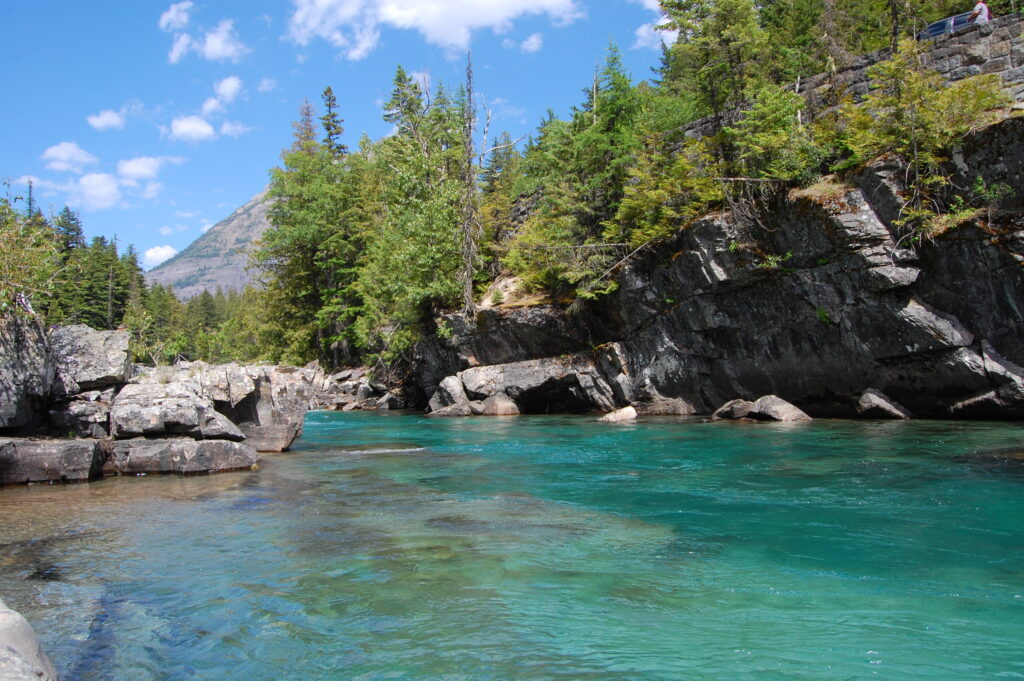
What You Will See: The Johns Lake Loop trailhead is located about 1.5 miles east of Lake McDonald Lodge on the Going-to-the-Sun Road. If this trailhead is full, you can park at the Sacred Dancing Cascade parking area and start there instead. The trail takes you through a peaceful cedar-hemlock forest full of lush mosses and ferns. You will see Johns Lake, Sacred Dancing Cascade, and McDonald Falls.
When you reach Johns Lake, you will see towering Mt. Stanton and Mt. Vaught behind it. After Johns Lake, the trail continues onward to Sacred Dancing Cascade, one of the most beautiful parts of McDonald Creek. The water here is so powerful, bright blue, and clear. Continue on the loop to reach McDonald Falls and be amazed by the power of the water. Always use caution near water in Glacier. A fall into the fast, cold water of McDonald Creek can be deadly. I would consider the Johns Lake Loop to be a hidden gem. Walking alongside McDonald Creek is an amazing experience, but most people just view it from their car.
Tips: There are no restrooms or water spigots at the trailhead; the nearest facilities are at Lake McDonald Lodge.
What You Will See: Hidden Lake Overlook is, in my opinion, one of the most rewarding trails in Glacier. The trail starts at Logan Pass, and carries you through alpine meadows and past towering peaks to a stunning overlook of Hidden Lake. The trail is a boardwalk part of the way, with stairs built into it as you climb in elevation. If your knees have trouble going up and down stairs, I’d recommend hiking poles.
Watch for wildlife like mountain goats, bighorn sheep, and marmots. When you reach the overlook, you can continue hiking down to the lake, but this adds a few miles, and the switchbacks are so steep coming back up that I don’t personally think it’s worth it.
Tips: Make sure to bring warm clothes even in the middle of the summer! The weather at Logan Pass can be very unpredictable.
GOOD TO KNOW: The Logan Pass parking lot fills up in the morning and stays full throughout the day. I think sunrise or sunset are the most beautiful times to do this trail, and you will be more likely to find a parking spot.
What You Will See: The Dawson-Pitamakan Loop (or the Pitamakan-Dawson loop, depending on which direction you hike it) is a spectacular tour through Glacier’s awe-inspiring landscapes. Some of my favorite views in the park are seen from this hike. The trailhead is in Two Medicine, which is a more remote and less busy part of Glacier, but there will certainly still be people around.
If you hike the Dawson-Pitamakan direction, you start along the shore of Two Medicine Lake. Once you reach the head of the lake, start the climb up to Dawson Pass. You will eventually be above treeline, and that is when the real magic begins. The views are unreal! When you reach Dawson Pass, be prepared for the wind. It is one of the windiest places in the park, in my experience. You are then on a trail on a rocky scree slope around the back of Rising Wolf Mountain until you reach Pitamakan Pass. The views here are incredible as you look into a remote valley with jagged peaks and waterfalls visible in the distance. There are sometimes steep snowfields in this area well into the summer, so check with rangers about trail conditions before you hike. Once you reach Pitamakan Pass, you start descending back down into the valley and make your way back to finish the loop.
Tips: There are restrooms and water spigots by the Two Medicine General Store and in the Two Medicine Campground, both of which are near the trailhead.
GOOD TO KNOW: You can use the boat ride in Two Medicine to cut off the first 2.5 miles of this hike, or the last 2.5 miles at the end of the day (depending on which direction you go). I would take off the miles at the end of the day, but that means you have to get an early enough start and hike fast enough to make it for the last boat of the day. Check out the Glacier Park Boat Company website for more information about tickets and boat ride times!
What You Will See: The trail to Iceberg Lake starts with a steep climb for the first ¼ mile, but then levels out for a very gradual and enjoyable walk the rest of the way to the lake. The trail is in the forest for much of the way, but when you leave the trees as you get closer to the lake, the views are absolutely incredible.
Iceberg Lake is situated at the back of what looks like a massive amphitheater of rock. The turquoise color of the lake and the icebergs floating in it, coupled with the towering rock walls all around you, make for an unforgettable view. This is a great hike for families and for people who are newer to hiking but still want a day on the trail. I have hiked this trail more than any other trail in the park, and I never get tired of it. The wildflowers, the wildlife, and the landscape make it one of the best hikes you can do in Glacier. You can read our article How to Hike Glacier’s Iceberg Lake Trail: Quick & Easy Guide for more details.
Tips: There are restrooms and water filling stations at the Swiftcurrent Motor Inn near the trailhead.

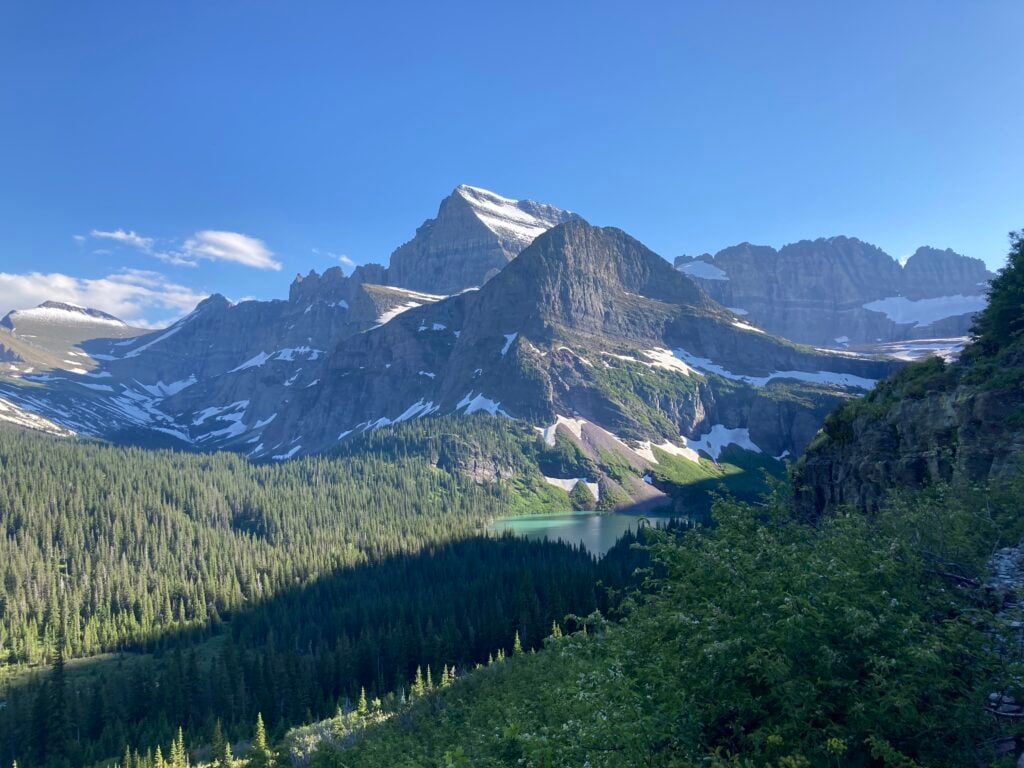
What You Will See: The Grinnell Glacier Trail begins in the woods, where you will walk along the shore of Swiftcurrent Lake for about a mile before you climb up and over a small hill to reach Lake Josephine. As you walk the length of Lake Josephine, you are in prime bear habitat. Be sure you’re making noise as you hike so you don’t surprise a bear!
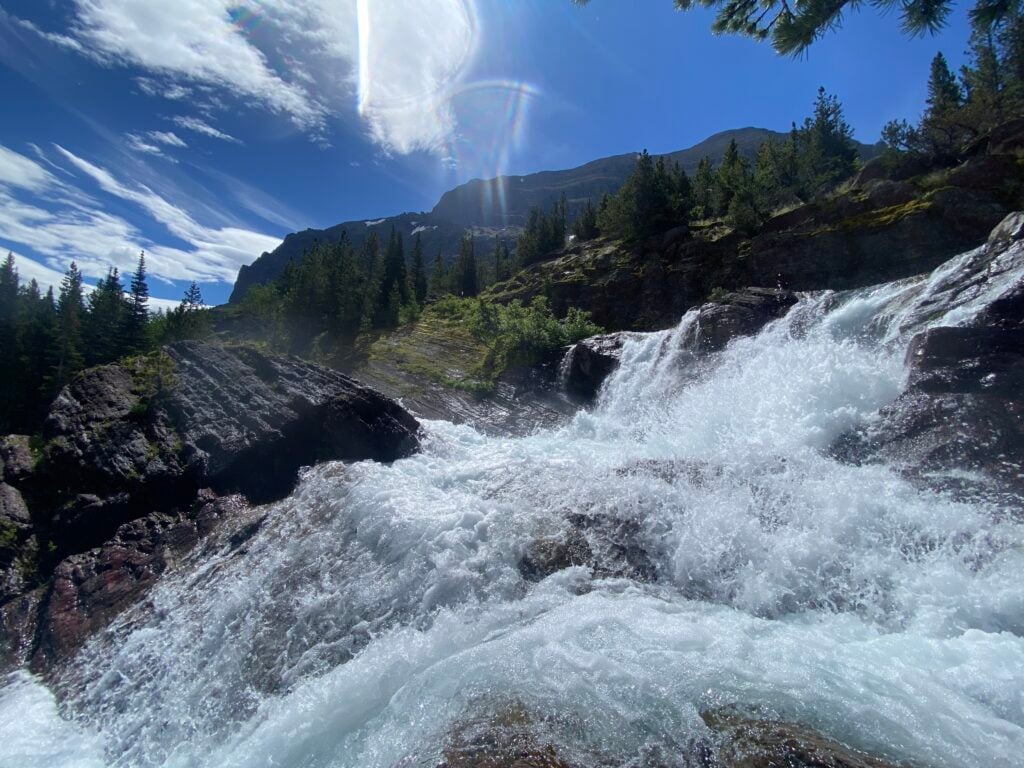
After following the shore of Lake Josephine, lined by wildflowers and songbirds, you begin to gain elevation as the trail traverses Grinnell Mountain. After climbing in elevation for about a mile, you will be rewarded with a stunning view of the bright turquoise Grinnell Lake below you. Once you see Grinnell Lake for the first time, the next exciting landmark is Thunderbird Falls. This waterfall cascades over the trail (sometimes gently, sometimes not so much), so make sure you have your rain jacket on to keep from getting drenched on your way under!
Soon, you will reach the “Sound of Music” meadows, which will greet you with vibrant wildflowers and a view of your destination. When you finally reach Grinnell Glacier, sit down, relax, and soak in the magnificence of the place you are in. It is a beautiful place, and to sit near the edge of a glacier is a very special experience.
Tips: There are restrooms and water at the Many Glacier Hotel and at the Grinnell Glacier Trailhead. You can start the trail from either location for minimal change in distance and elevation gain.
MUST KNOW: You can shorten this hike by taking the boats offered by Glacier Park Boat Company. If you take the boat both ways, it cuts off a total of 5 miles! Check out our article about the Grinnell Glacier Boat Tour and Hike for more detailed information!
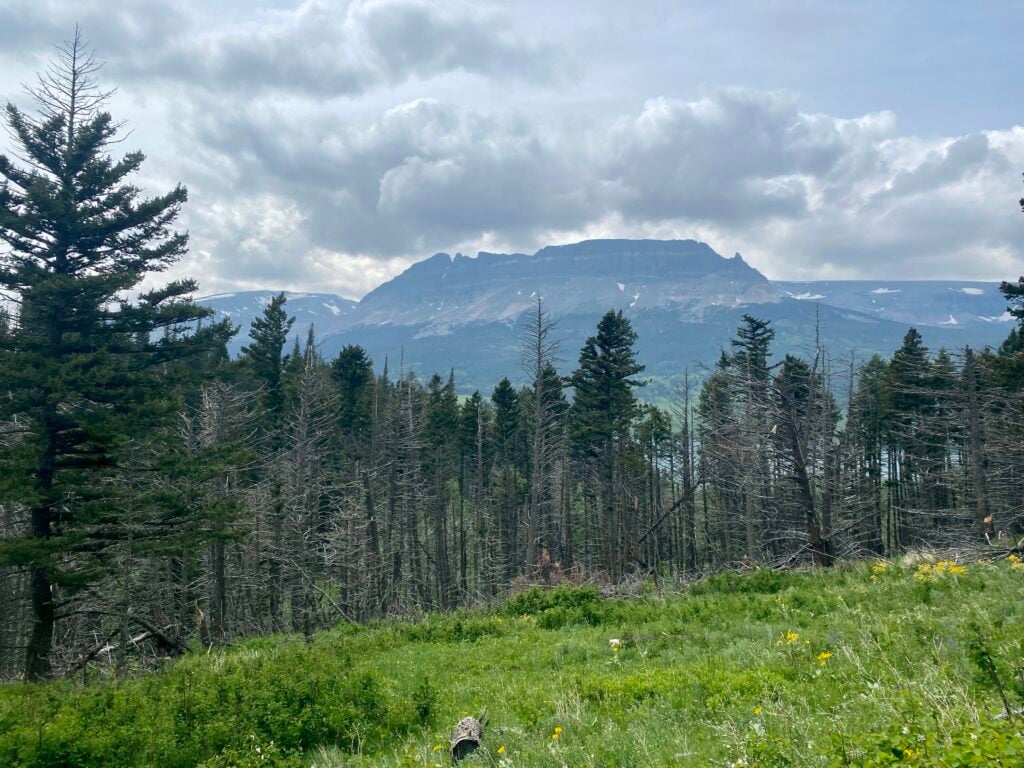
What You Will See: The Piegan Pass trail is not very popular compared to many of the others on this list, but it is a fantastic one and shouldn’t be overlooked. The trail starts at Siyeh Bend on the Going-to-the-Sun Road and, after following a creek for a little while, starts climbing gradually through the forest. You will continue climbing in elevation until you get above treeline.
Thankfully, the trailhead starts at a relatively high elevation on the road, so you don’t have too much climbing to do before you’re out of the trees. The views once you’re out of the trees are amazing, and the mountains in the distance are stunning. The wildflowers on this trail also tend to be incredible! The trail follows a rocky slope up to the pass. When you reach the pass, I’d continue a few tenths of a mile down the trail because the view into the Many Glacier Valley (and beyond) is the best.
You can do this hike as a point-to-point adventure from Siyeh Bend to Many Glacier, but you’ll need to arrange for a ride at the end of your hike. This makes the distance about 16 miles, but the elevation gain stays about the same. I really enjoy doing the hike this way, if you can sort out transportation.
Tips: There are no restrooms or water spigots at the trailhead. Parking is also very limited. I highly recommend using the free shuttle from St. Mary Visitor Center to get to this trailhead! There are restrooms and water at the visitor center.
What You Will See: The Red Rock Falls trail is loved for the views, the peaceful forest, and the opportunity to see moose and other wildlife. The trail starts from the Swiftcurrent Motor Inn parking lot. As you begin the hike, about ½ mile down the trail, look for a sign directing you to Fishercap Lake. This is only a short detour. Fishercap Lake is a very popular place for moose because of the shallow water and abundant aquatic vegetation for them to feed on!
After you check out Fishercap Lake, head back to the main trail and continue on to Red Rock Lake and Red Rock Falls. Look for moose in Red Rock Lake, too! The falls are beautiful, and there are lots of places to sit and eat a snack. This is an amazing trail for families and folks who aren’t avid hikers but still want a beautiful hike. I love this trail.
Tips: There are restrooms and water filling stations located at the Swiftcurrent Motor Inn.
What You Will See: The Beaver Pond Loop trail starts from the parking area for the 1913 Ranger Station in St. Mary. I recommend starting the trail from the east side of the parking area, closest to the Ranger Station, and continuing in a clockwise direction. The views are better this way, and the terrain is gentler. As the name would suggest, this trail takes you around a few beaver ponds. You will also walk through a lush spruce-fir forest, aspen woodlands, grassy meadows, and a forest that burned in 2003. Considering that the trail is only 3.6 miles long, you get a great bang for your buck in terms of landscape variability and wildlife viewing opportunities!
Tips: The nearest restrooms and water to this trailhead are located at the St. Mary Visitor Center or at the gas station in St. Mary.
INTERESTING FACT: Beavers are ecosystem engineers! In building their dams, they create ponds that become critical habitat for all sorts of animals like moose, fish, owls, woodpeckers, great blue herons, and deer.
| West Side | East Side | |
| Best for Kids | Trail of the Cedars | Red Rock Falls |
| Best Hike for Wildlife | Hidden Lake | Iceberg Lake |
| Most Beautiful | Hidden Lake | Grinnell Glacier |
| Most Accessible | Trail of the Cedars | Red Rock Falls |
| Best Backcountry Experience | Highline Trail | Dawson-Pitamakan |
| Best for Solitude | John’s Lake Loop | Beaver Pond Loop |
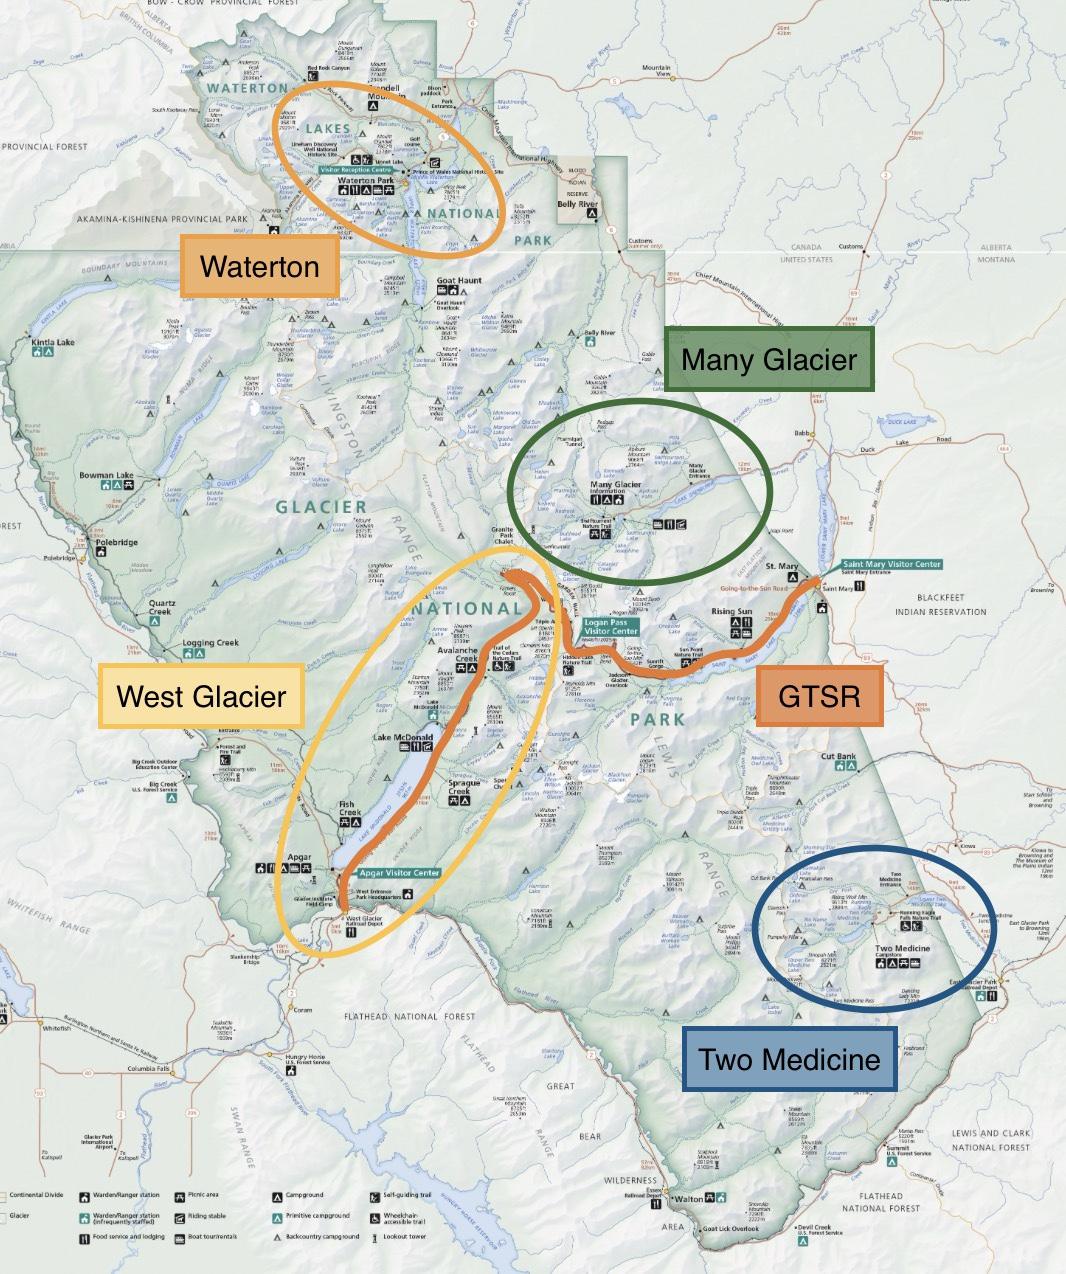
Glacier is a large park (over 1 million acres!) and is generally referred to as the “west side” and the “east side”. The continental divide runs through the park from north to south and forms the dividing line between the west side of Glacier and the east side of Glacier.
The west side of Glacier is a temperate rainforest ecosystem known for lush, dense cedar-hemlock forests. It is closer to towns like Columbia Falls, Kalispell, and Whitefish. Lake McDonald is on the west side, as well as the West Entrance, the Camas Entrance, and the Polebridge Entrance.
The east side of Glacier is home to more open forests and meadows and is drier than the west side. It is more remote, and the closest towns are Browning (30 minutes), Cut Bank (1.5 hours), and Great Falls (3 hours). The east side is home to the St. Mary Entrance, the Two Medicine Entrance, and the Many Glacier Entrance.
DISCOVER: What is the Best Entrance for Glacier National Park?
DON’T MISS: West Glacier vs. Many Glacier: Which Side is Better? (Lodging + Things To Do)
Get our done‑for‑you, 7‑12 day route with exact drives, maps, and must‑see stops so you don’t waste time in traffic or miss the best views
*Day‑by‑day plan for Banff, Glacier, Jasper, and Waterton
*All the Details You Need: Time frames, driving routes, and where to sleep each night to reduce backtracking
*Best Friend Guarantee: Love it or get your money back
Because Glacier is such a large park, it requires a lot of driving. It takes 2-3 hours to drive from the West Entrance to the St. Mary Entrance on the Going-to-the-Sun Road, which makes traveling between the two sides of the park time-consuming. Luckily, the drive is the prettiest drive you will likely ever do in your life, so it really could be worse.
If possible, I would recommend booking lodging on both sides of the park at different parts of your trip. This will allow you to see more of the park without having to drive back and forth so much!
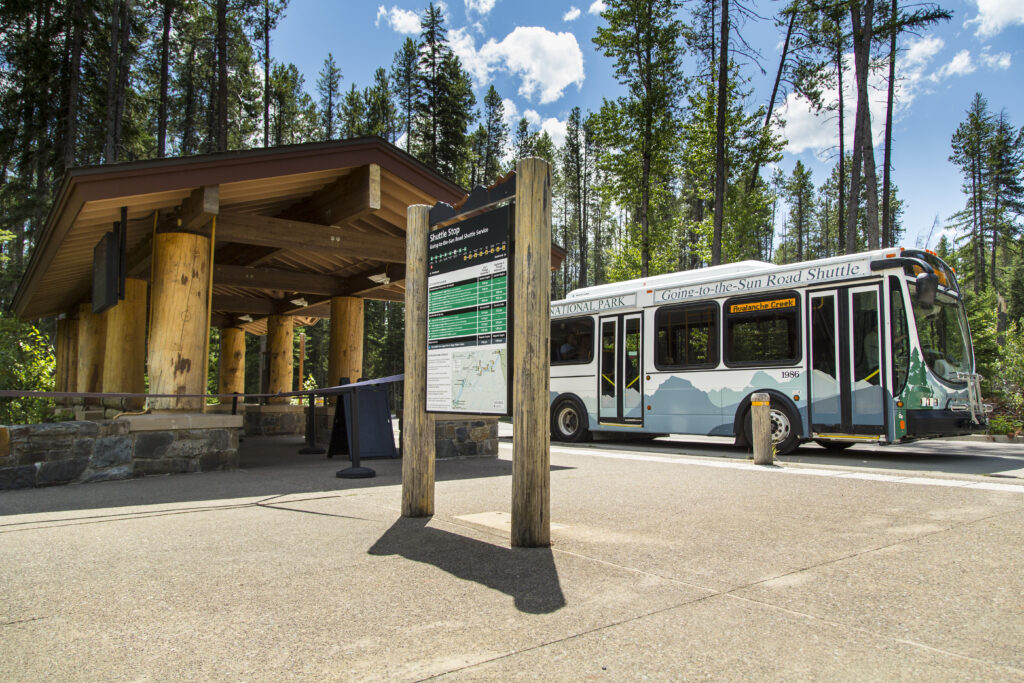
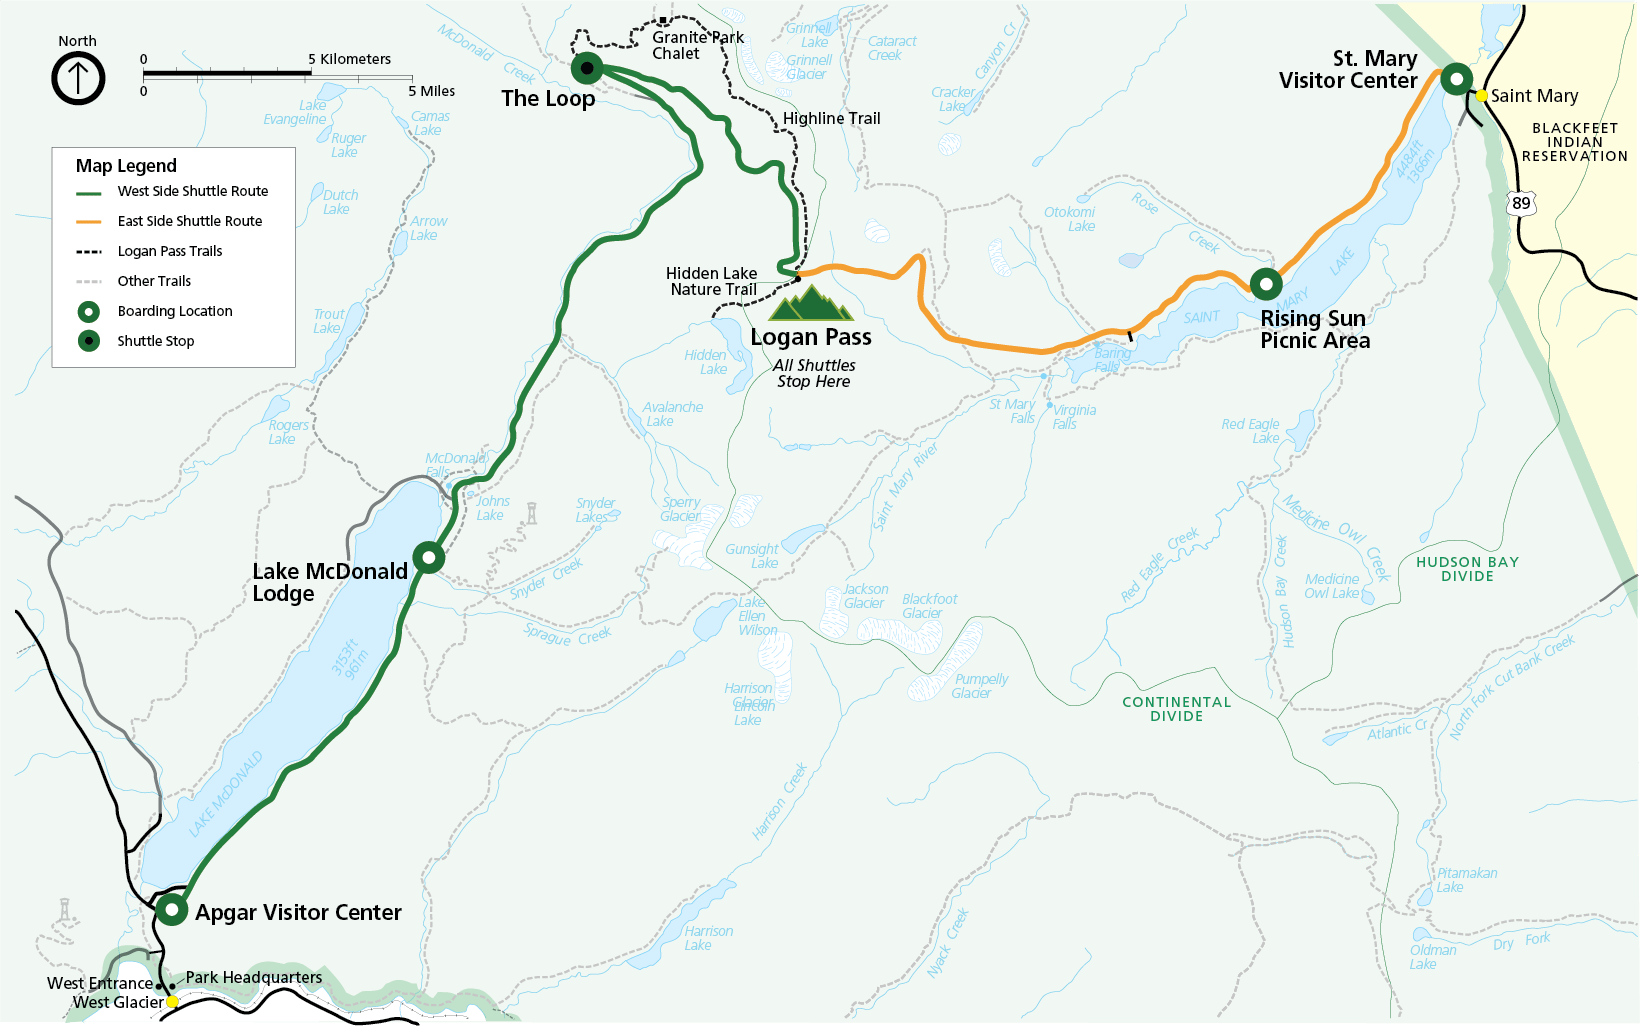
The National Park Service operates a shuttle on the Going-to-the-Sun Road. Beginning in 2026, you must purchase a ticket for a ~$1 processing fee to ride. You can purchase your ticket at recreation.gov, where you will also choose your pick-up stop. The shuttles start at the Apgar Visitor Center and Lake McDonald Lodge on the west side and the St. Mary Visitor Center and Rising Sun on the east side and carry passengers up to Logan Pass. Parking at Logan Pass is now limited to 3 hours, so the shuttles are required if you plan to spend more time there.
Summer shuttle service begins July 1 and continues through Labor Day. See the Glacier National Park website for more detailed information.
Parking can be extremely difficult in Glacier because there are simply not enough parking spaces to accommodate the number of people in the park. I would recommend starting hikes early in the morning or in the evening for the best chance at finding a parking spot at your preferred trailhead. If you are not an early riser or the hike you want to do is too long to start in the evening, be prepared to change plans if you cannot find parking. There are no bad hikes, so if you can’t find parking at the trailhead you want, don’t be discouraged.
Hiking is hard work, and trails can often take longer than you think they will. Bring plenty of food and water so that you are comfortable and fueled throughout the day. I am unwilling to risk running out of water, so I bring 3 liters of water and a water filter on almost every hike I go on. That is overkill, but better safe than sorry! The general recommendation is to bring 1 liter of water for every 2 hours of hiking.
The only thing worse than running out of water on the trail is running out of food. Bring plenty of food, and make sure it is food you will want to eat! I sometimes lose my appetite if I am exercising hard or it is a really hot day, so I always make sure to bring food that is easy to eat and has lots of calories and carbs. Gummy worms have saved me in many of my darkest moments on the trail.
The weather in Glacier can change in what feels like an instant. Always bring a raincoat and layers to keep you warm, even if the weather forecast says it will be a nice day! You can rarely trust the weather forecast in the mountains, and it is never fun (and always dangerous) to get cold and wet on the trail.
Trails can close at any time because of bear activity, mountain lion activity, weather, and more. Trails may also be closed seasonally because of dangerous snow conditions. You might arrive at a trailhead and find that there is no parking to be had. Always have a backup plan and a good attitude!
DON’T MISS: Do I Need Bear Spray in Glacier National Park?

A day of hiking will work up an appetite, and it is important to refuel for your next day of adventures! There are not a ton of dining options in Glacier, but the ones that do exist are summarized in the table below.
| Dining Option | Location | Price (per person) |
|---|---|---|
| ‘Nell’s | Many Glacier, Swiftcurrent Motor Inn | $$ |
| Ptarmigan Dining Room | Many Glacier Hotel | $$-$$$ |
| Swiss Lounge | Many Glacier Hotel | $$ |
| Heidi’s Snack Shop and Espresso | Many Glacier Hotel | $ |
| Two Dog Flats Grill | Rising Sun | $$-$$$ |
| Eddie’s Café | Apgar Village | $$ |
| Jammer Joe’s Grill and Pizzeria | Lake McDonald Lodge | $$ |
| Lucke’s Lounge | Lake McDonald Lodge | $$-$$$ |
| Russell’s Fireside Dining Room | Lake McDonald Lodge | $$-$$$ |
($=inexpensive, $10 and under; $$=moderately expensive, $10-$25; $$$=expensive, $25-$45)
There are also plenty of dining options outside of Glacier. My favorite restaurants in the West Glacier area are Josephine’s, The Back Room, and Backslope Brewing. My favorite restaurants in the East Glacier area are Two Sisters Cafe, The Cattle Baron, Glacier’s Edge Cafe, and Serranos.
You can read more about dining options in our article 9 Great Places to Eat in Glacier National Park.
Planning a vacation shouldn’t be stressful. We created a step-by-step itinerary so you can visit the best places at the right times.
Not only that, but we’ll tell you about the park while you drive with our audio guide! Stop planning and start having the vacation of your dreams now!
GLACIER TRIP PLANNER: To read or watch all of our content about Glacier National Park, check out our Glacier Homepage
THINGS TO DO: Check out what not to miss and other things to do in Glacier, including hiking, watching a sunrise, taking a red bus tour, and the amazing boat tours. Find out how to drive the Going-to-the-Sun Road with our free printable
WHERE TO EAT: Don’t miss the best places to eat in Glacier National Park
WHERE TO STAY: Learn all about where to stay when visiting Glacier National Park
KNOW BEFORE YOU GO: Find out which entrance is best for Glacier National Park, as well as if you need bear spray while visiting, or if swimming is allowed
WATCH: Enjoy videos of gorgeous Glacier National Park while learning our best tips for visiting by watching our Glacier YouTube Playlist